
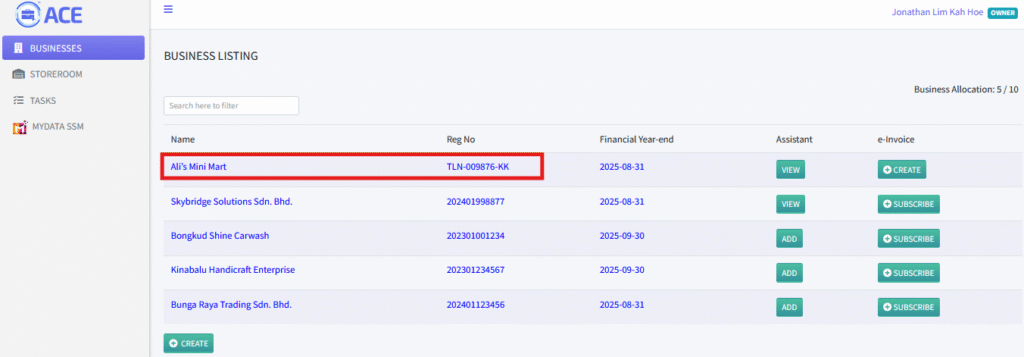
1. Before creating an invoice, ensure all Business Information is filled out.
Go to the Business Listing section and click on a business to view or update its details.
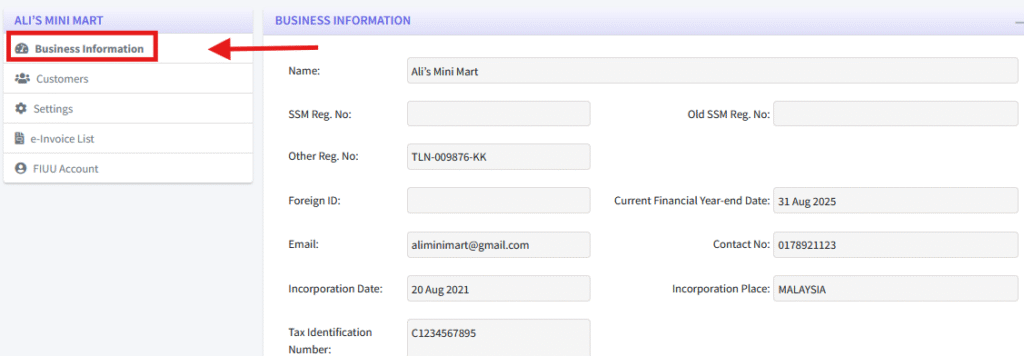
2. Navigate to the “Business Information” tab.
Scroll down to locate the “EDIT” button. Click it and complete all the required fields. Once all information is filled out, click the “UPDATE” button at the bottom of the page to save your changes.
3. Next, go to the “Settings” tab.
Scroll to the bottom of the page and click the “EDIT” button. In this section:
- Complete the Bank Information section.
- Fill out the Invoice Settings section.
- Upload your business logo.
- Once done, click the “SAVE” button to apply the changes.
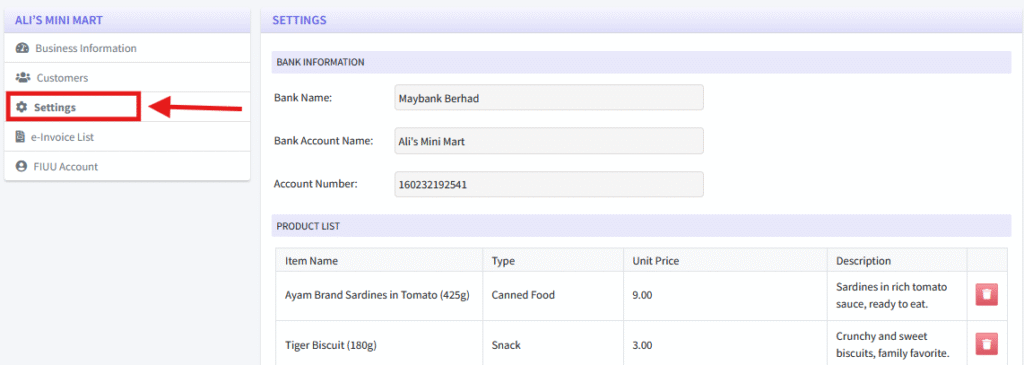
For the following sections:
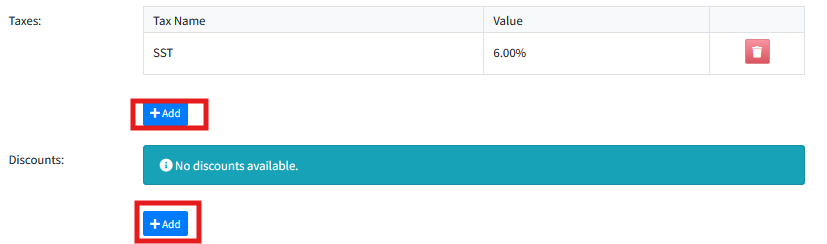
Taxes and Discounts – Use the “+ADD” button in each section to add entries.
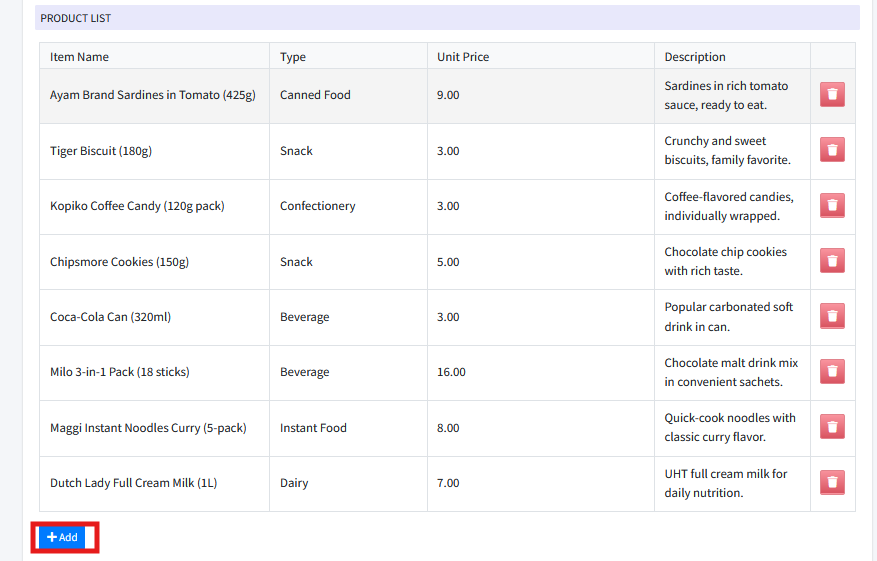
Product List – Click the “+ADD” button to add products.
4. Navigate to the “Customers” tab.
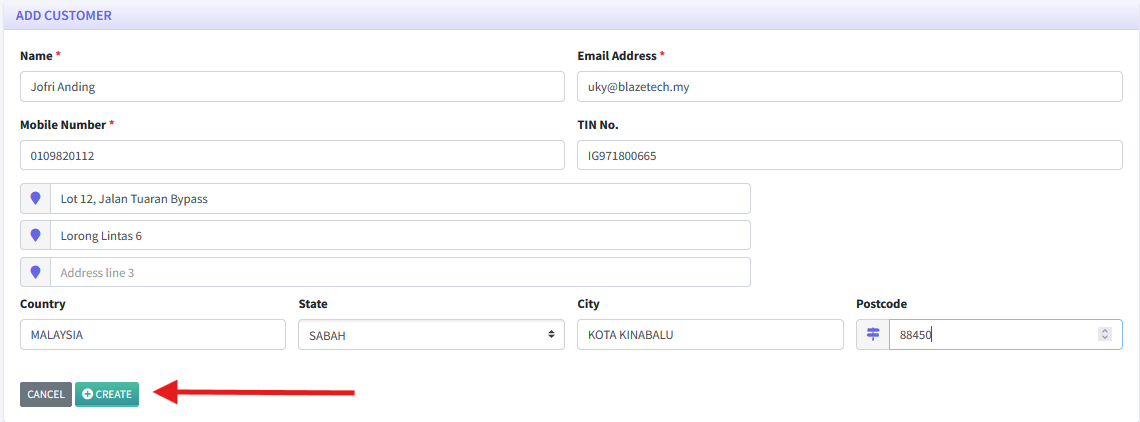
To add a new customer, click the “ADD” button and fill in the required details.
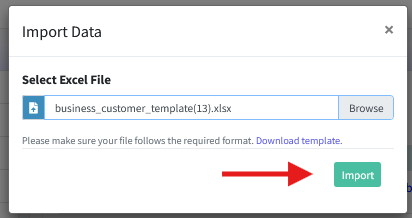
For bulk customer uploads, click the “IMPORT” button and download the Excel template by clicking the Download template text link. Fill out the template, then upload it to import multiple customers at once.

At the bottom of the Excel template, you’ll find two tabs: “Individual Customers” and “Business Customers”.
Ensure all required fields are filled accurately to avoid import errors.
Each tab includes sample data for your reference — please delete the sample entries before uploading.
Begin entering your own customer data starting from row 3 in the appropriate tab (either Individual or Business Customers).

Save the completed Excel template, return to the Customers listing page, click the “IMPORT” button, browse for the saved file, and click “Import” to upload your customer data.
5. On the Customers listing page, you’ll find an e-Invoice column with a “CREATE” button next to each customer.
To issue an e-Invoice, simply click the “CREATE” button for the relevant customer.

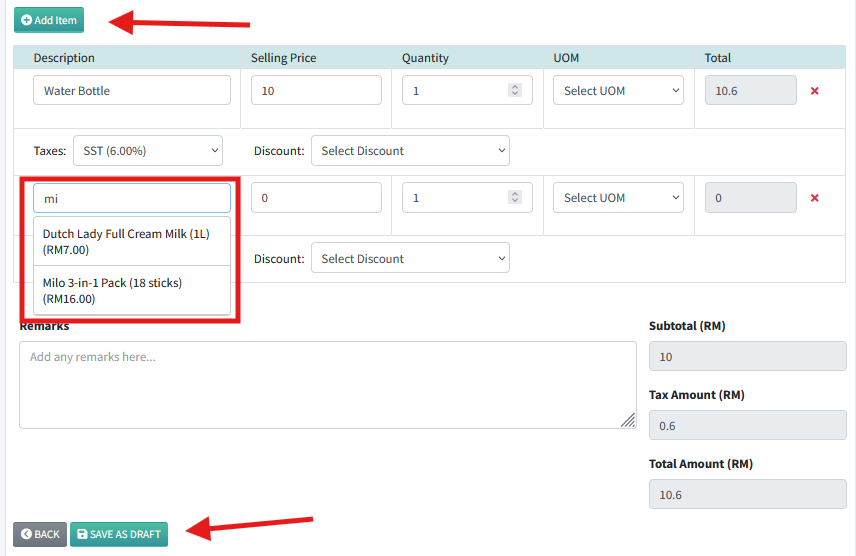
6. In the Customer e-Invoice Form section, click the “Add Item” button and enter the item description.
A dropdown will automatically appear with options from the Product Listing set under Settings, but you’re also free to enter a custom description not listed there.
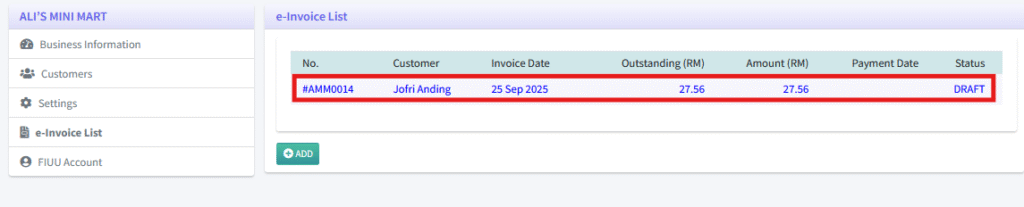
Once all items are added, click “SAVE AS DRAFT” to save the e-Invoice and you will be redirected to the e-Invoice List.
7. Click on the drafted invoice to open it. You can still make edits at this stage. Once you’re ready, click the “PROCESS” button located at the bottom of the form to proceed.

8. Once the invoice is processed, an email with the attached invoice will be sent automatically. The invoice status will be marked as “UNPAID”. After receiving payment, the firm can click the “MARK AS PAID” button to update the invoice status.

9. Enter the transaction details, including the Transaction ID for your records, the amount received, and the payment channel. Then, click the “SAVE” button to update the invoice status to “PAID”.

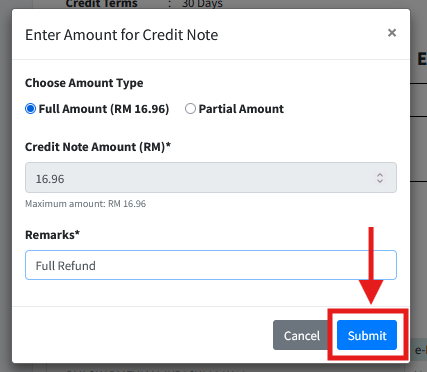
10. A Credit Note can only be issued after the invoice has been processed. Click the “ISSUE CREDIT NOTE” button, then choose whether the credit is for the full amount or a partial amount.
Enter any relevant remarks for the Credit Note, then click “Submit” to complete the process.
If selecting a partial amount, you will need to enter the specific amount to be credited.

11. An email will be sent to the customer containing both the original invoice and the Credit Note as attachments.