
What is MFA and 2FA?
MFA refers to Multi-Factor Authentication, an additional security measure used to protect your account during sign-in. It requires a user to verify their identity using more than one authentication factor, making it significantly more difficult for unauthorised individuals to gain access.
2FA refers to Two-Factor Authentication, the most common form of MFA, requiring a second verification step in addition to your username and password. Since passwords can be stolen, guessed, or accidentally shared, this extra layer of security helps ensure that only you can access your account.
ACE supports the following 2FA methods:
- Email verification: A verification code is sent to your registered email address.
- Authenticator app: A verification code is generated from an authenticator app on your mobile device.
When you activate any of the method above, an extra step is added whenever you login to ACE.
For example, if you have email verification enabled, the following is the login process;
- Enter your email and password on the login form
- If the combination is correct, the next screen asks for a 6-digit number that was sent to your email.
- Open your Inbox and look for the email sent from ACE. Copy the 6-digit.
- Enter the digits into the form and submit.
- If it is correct, then you are logged in.
This security setting gives your login an extra layer of security.
Activating Email 2FA
Email 2FA lets you receive a verification code through your registered email address when signing in. Before you begin, make sure you can access the email address linked to your account.
1. Click your name at the top-right corner of the page to open the user menu, then click SECURITY.
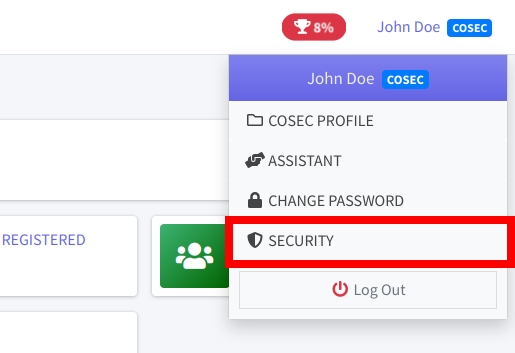
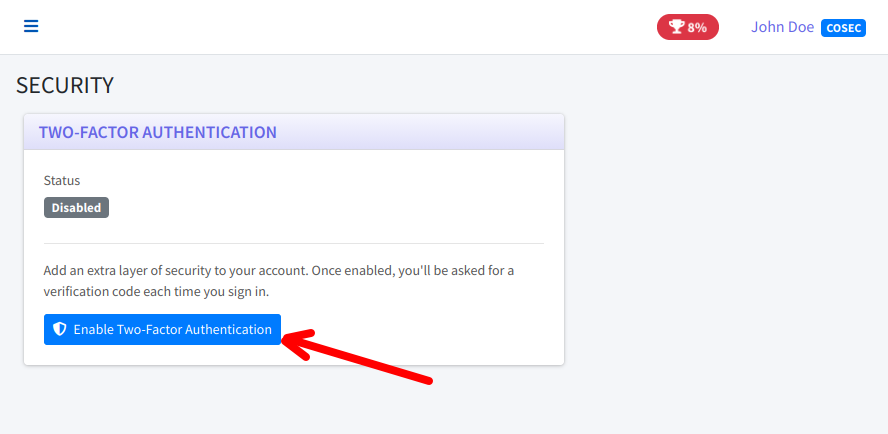
2. On the SECURITY page, click Enable Two-Factor Authentication.

3. On the Set Up Two-Factor Authentication page, choose Email Verification.
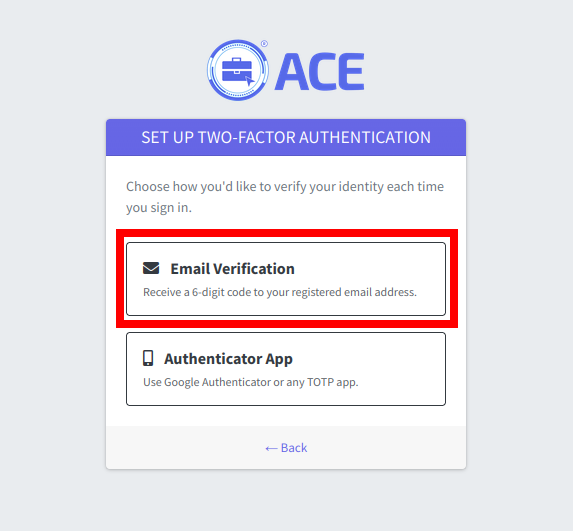
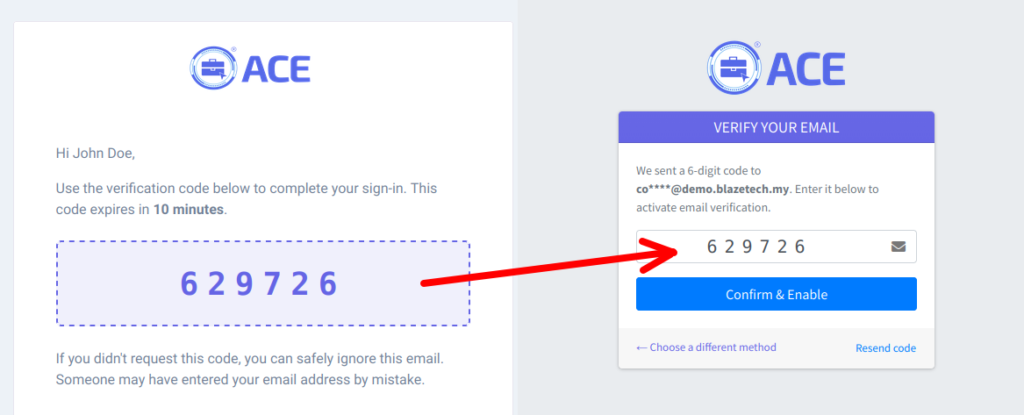
4. Check your registered email inbox for the 6-digit code, then enter it in the Verify Your Email page. Once entered, click Confirm & Enable.
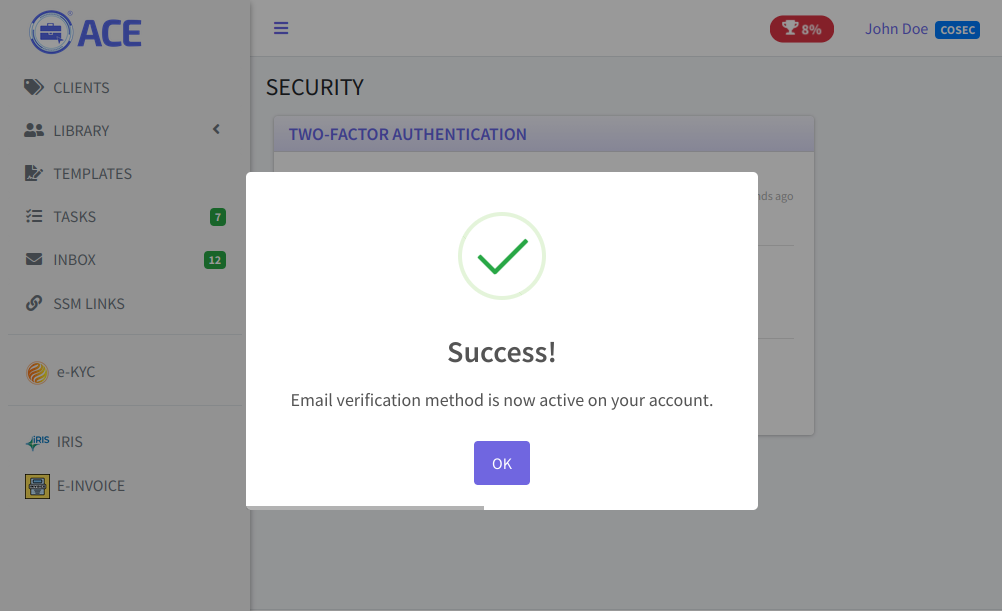
5. You will return to the SECURITY page with a success message, indicating that Email 2FA is enabled on your account.
Activating Authenticator App 2FA
An authenticator app is a mobile application that generates time-based, one-time verification codes for 2FA locally on your device using secret algorithms. It can provide instant access to your codes without the need to wait for slow emails and text messages, and does not require an Internet connection once set up. Some examples of popular authenticator apps are 2FAS Auth, Google Authenticator and Microsoft Authenticator.

1. Click your name at the top-right corner of the page to open the user menu, then click SECURITY.

2. On the SECURITY page, click Enable Two-Factor Authentication.
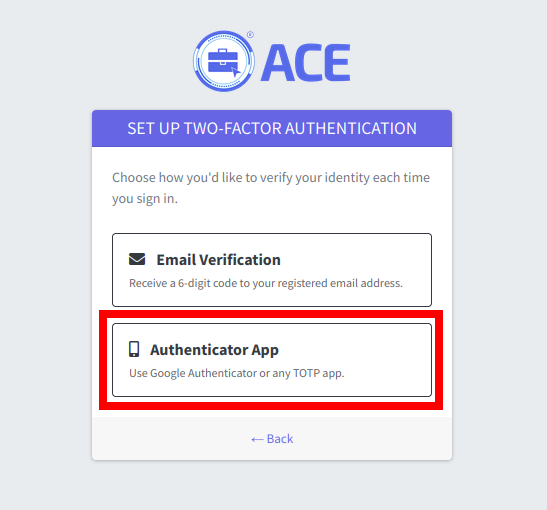
3. On the Set Up Two-Factor Authentication page, choose Authenticator App.
4. On the Set Up Authenticator App page, scan the QR code using your authenticator app of choice. Then, enter the 6-digit code shown in your authenticator app. Once entered, click Confirm & Enable.
5. You will return to the SECURITY page with a success message, indicating that Authenticator App 2FA is enabled on your account.
Changing 2FA Verification Method
At any time, you can change your desired 2FA method. You must complete the setup for the new method before it becomes active. To start the change process, navigate to the SECURITY page and click Change Method.
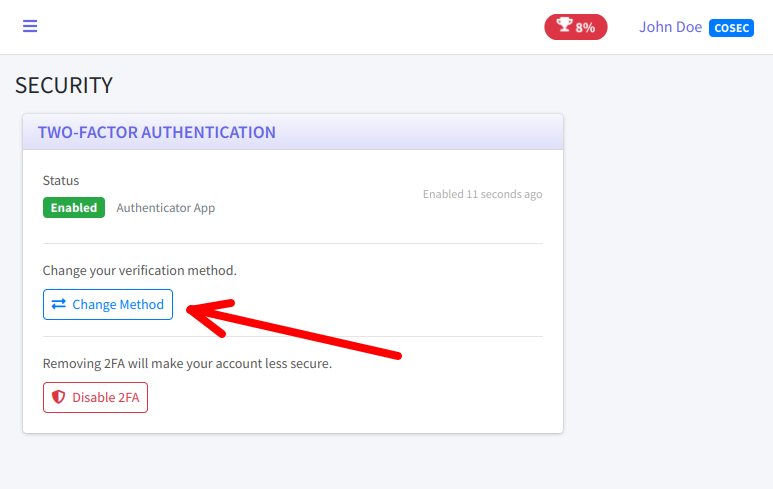
Then, complete the setup for your new 2FA method. For detailed setup instructions, please refer to the appropriate section above for either the Email or Authenticator App method.
Disabling 2FA
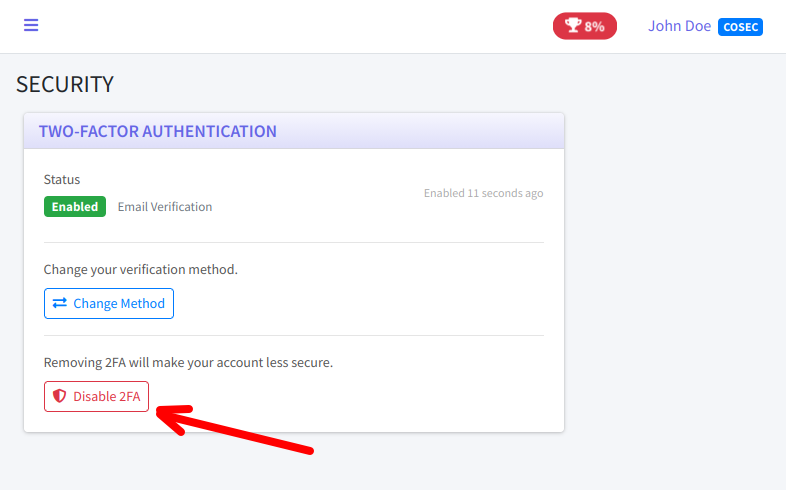
You can disable 2FA from the SECURITY page. After it is disabled, your account will no longer ask for a verification code when signing in.
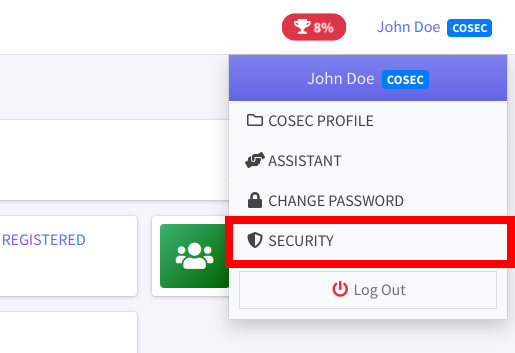
1. Click your name at the top-right corner of the page to open the user menu, then click SECURITY.
2. On the SECURITY page, click Disable 2FA.
3. On the Disable Two-Factor Authentication page, enter the required 6-digit code. The code will be sent to your email or generated by your authenticator app, depending on your currently active verification method. Once entered, click Confirm & Disable.

4. You will return to the SECURITY page with a success message, indicating that 2FA is disabled on your account.
