
Allow Create Client Permission to Assistant
To enable create client permission for an assistant, you must first do the following steps:
- Click on your username on the top-right of your screen. In the drop-down that appears, click on “ASSISTANT”.
- On the Assistant page, click on the pencil icon on any of your assistant that you wish to give the permission.
- Next, in the Edit Assistant page, tick the checkbox for “Create Client” under Assign Permissions section.
- Click on “UPDATE” to save.
To disable create client permission for an assistant, you may:
- Click on your username on the top-right of your screen. In the drop-down that appears, click on “ASSISTANT”.
- On the Assistant page, click on the pencil icon on any of your assistant that you wish to give the permission.
- Next, in the Edit Assistant page, untick the checkbox for “Create Client” under Assign Permissions section.
- Click on “UPDATE” to save.
Assign New Clients Task to Assistant
After allowing Create Client permission, proceed by following these steps:
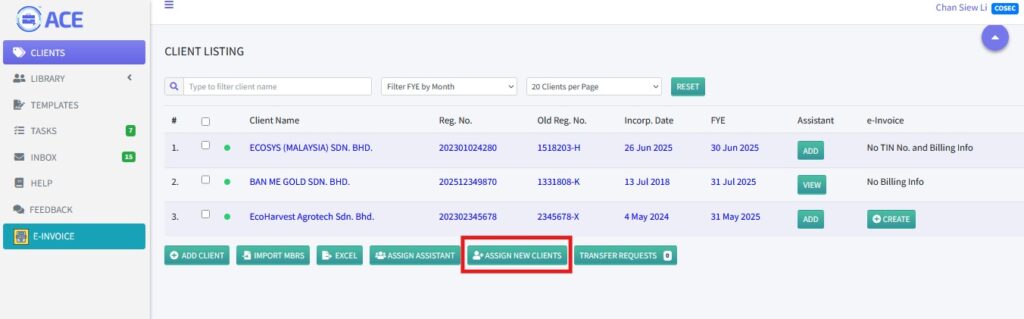
- Go to your Client Listing page.
- Scroll down & click on the “ASSIGN NEW CLIENTS” button.
3. In the Assign New Clients page, you may enter one client name per line (each line creates a task).
4. Next, from the assistant drop-down, select the assistant that you would like to assign the clients to.
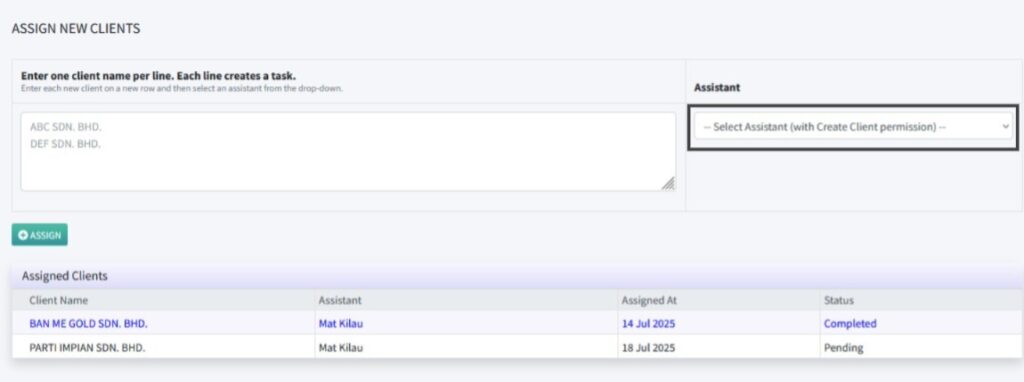
5. Click on the “ASSIGN” button.
6. The Assigned Clients table is now updated with the newly assigned clients to assistant.
- Status will be updated from Pending to Completed after assistant has completed this task