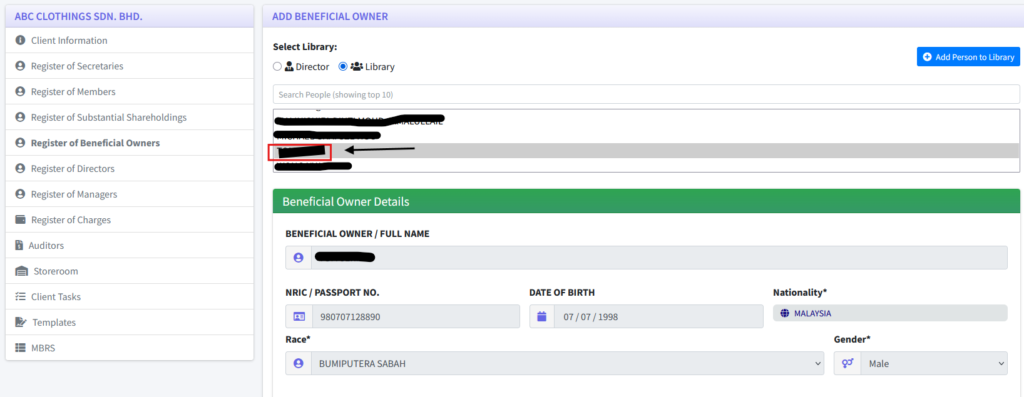
This section is for Cosec to declare and update the Beneficial Owners for each share certificate for a company. For each share, it will be listed here.
Updating The Beneficial Owner Record
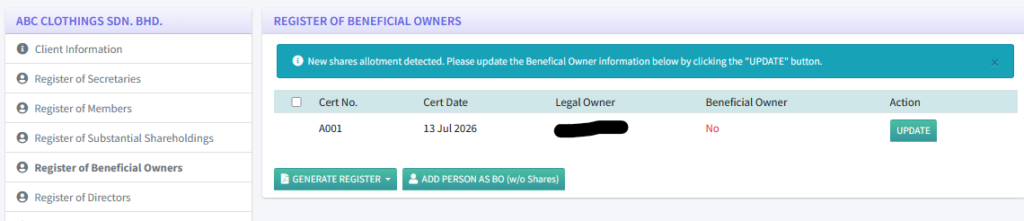
- From the Client Menu, click on “Register of Beneficial Owners”.
- A list of shares certificate will be displayed. Under the Action column, click UPDATE to modify the beneficial owner’s information.
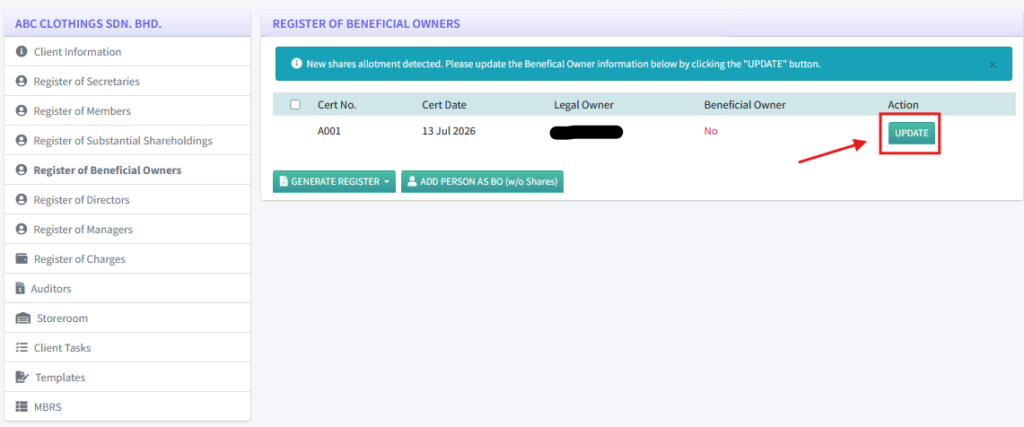
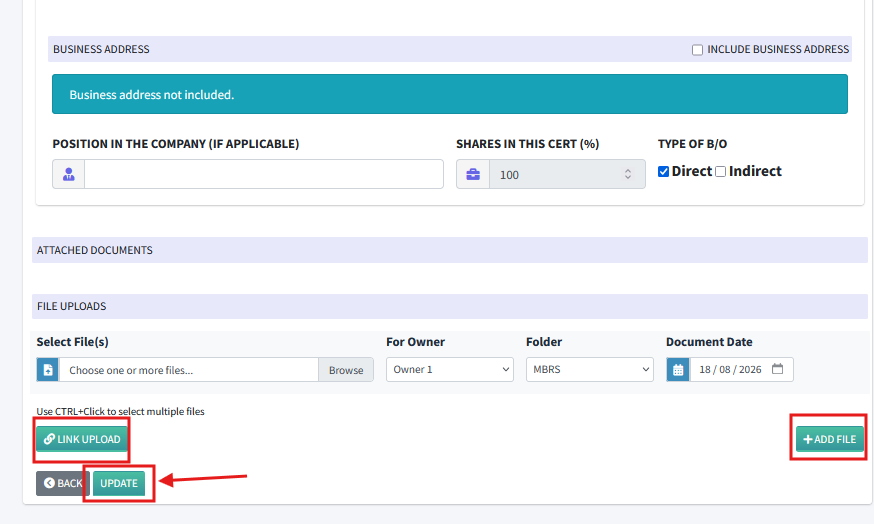
3. Inside the EDIT BENEFICIAL OWNER form, review the existing information and fill in any required details and upload the necessary files. Then, click UPDATE to save the changes. Once the update is successful, the beneficial owner’s status will change to “YES.”
4. After the update is completed, a RESET button will appear. Clicking RESET will remove all beneficial owner information and delete any uploaded documents.
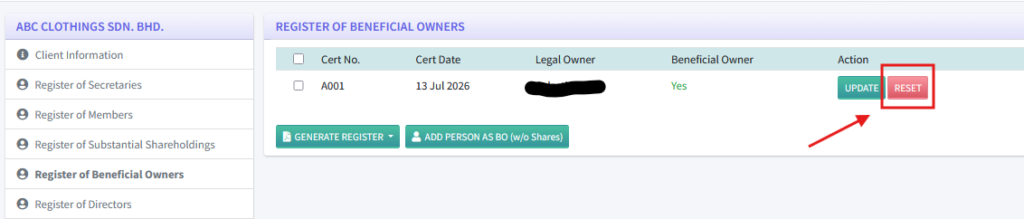
5. After clicking RESET, the beneficial owner information will return to its original state. You can then update the beneficial owner again as usual, following the same steps described earlier.
Generate register of Beneficial Owner
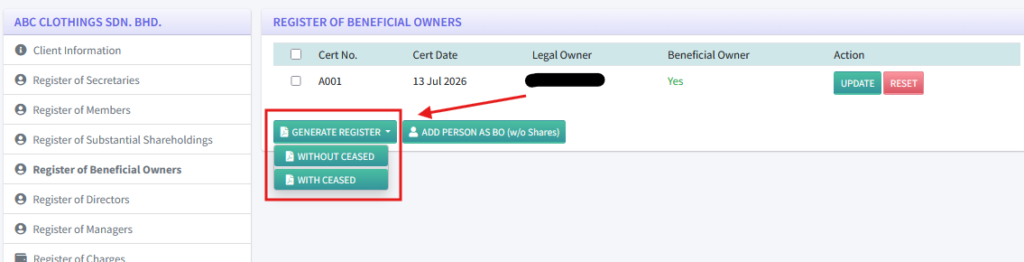
- To generate the Register of Beneficial Owner PDF:
- Click the GENERATE REGISTER button.
- A dropdown menu will appear.
- Select either:
- WITHOUT CEASED – to exclude ceased beneficial owners.
- WITH CEASED – to include ceased beneficial owners.
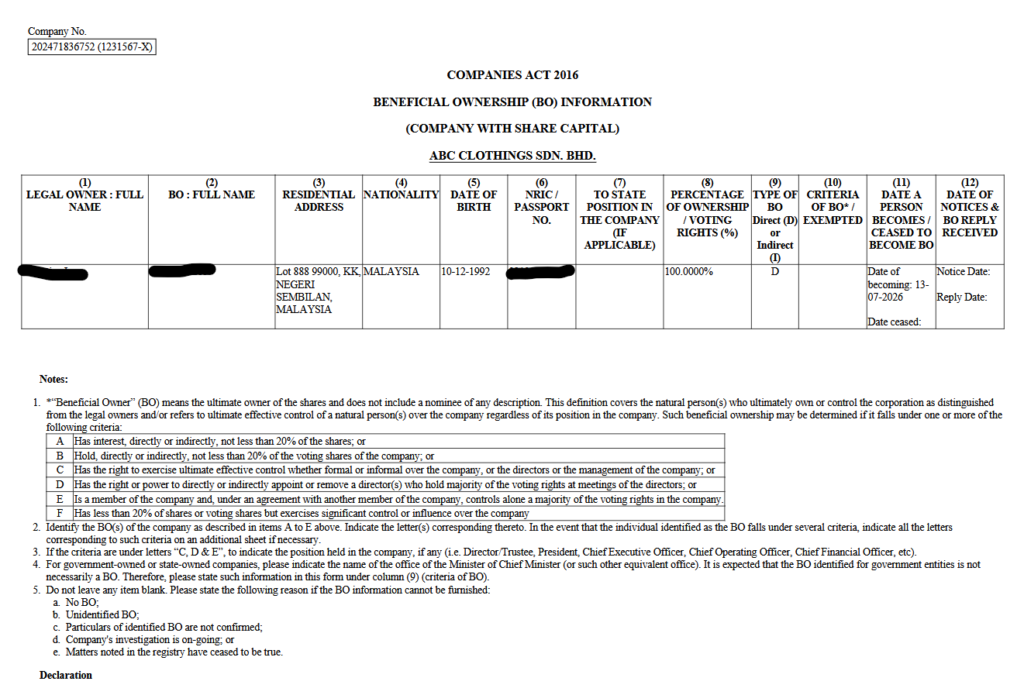
2. When you click WITHOUT CEASED, the system will generate the Register of Beneficial Owner containing only beneficial owners who are not ceased.
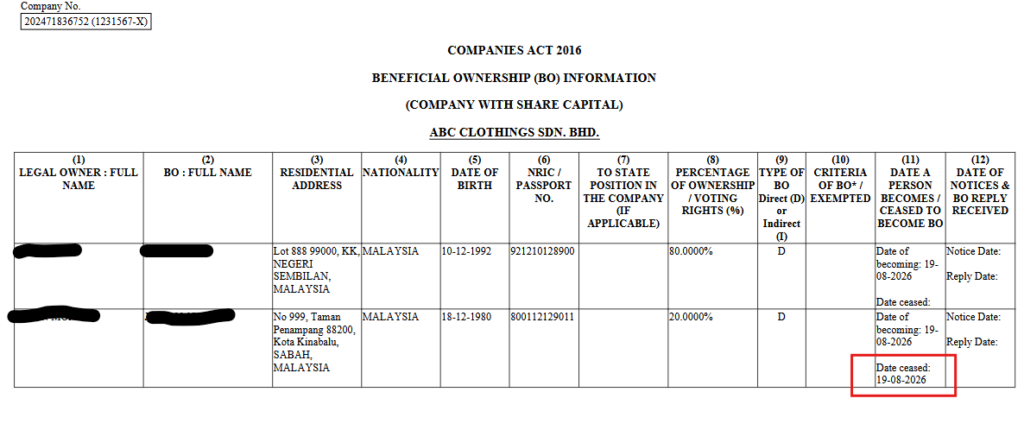
3. When you click WITH CEASED, the system will generate the Register of Beneficial Owner PDF including all ceased beneficial owners.
Add Person AS BO (w/o Shares)
- If you see the ADD PERSON AS BO (w/o Shares) button, you can use it to add a beneficial owner without shares.
- Click ADD PERSON AS BO (w/o Shares).
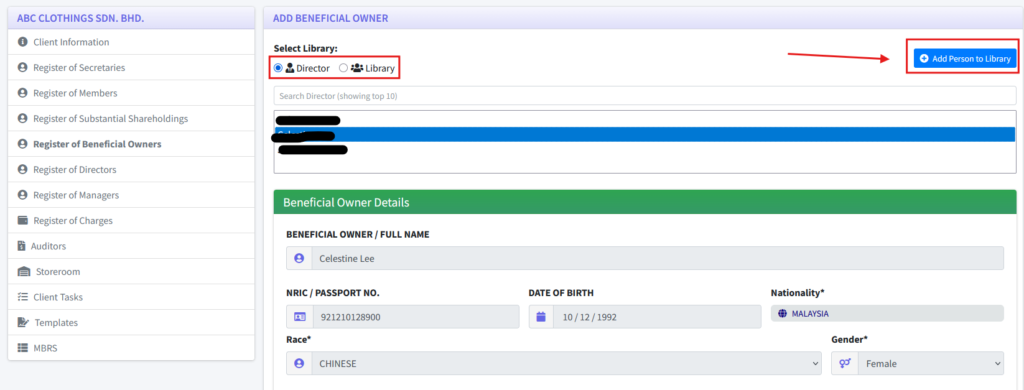
- You will be redirected to the ADD BENEFICIAL OWNER form.
- Select either:
- A director of the client, or
- A person from your library.
- If the person is new and not yet in your library, click Add Person to Library at the top-right corner to add their details.
2. If you choose to add a new person to the library, an ADD PERSON form will appear. Click Save Person to save the person to your library. Enter the person’s details in the required fields. Review the information you have entered.
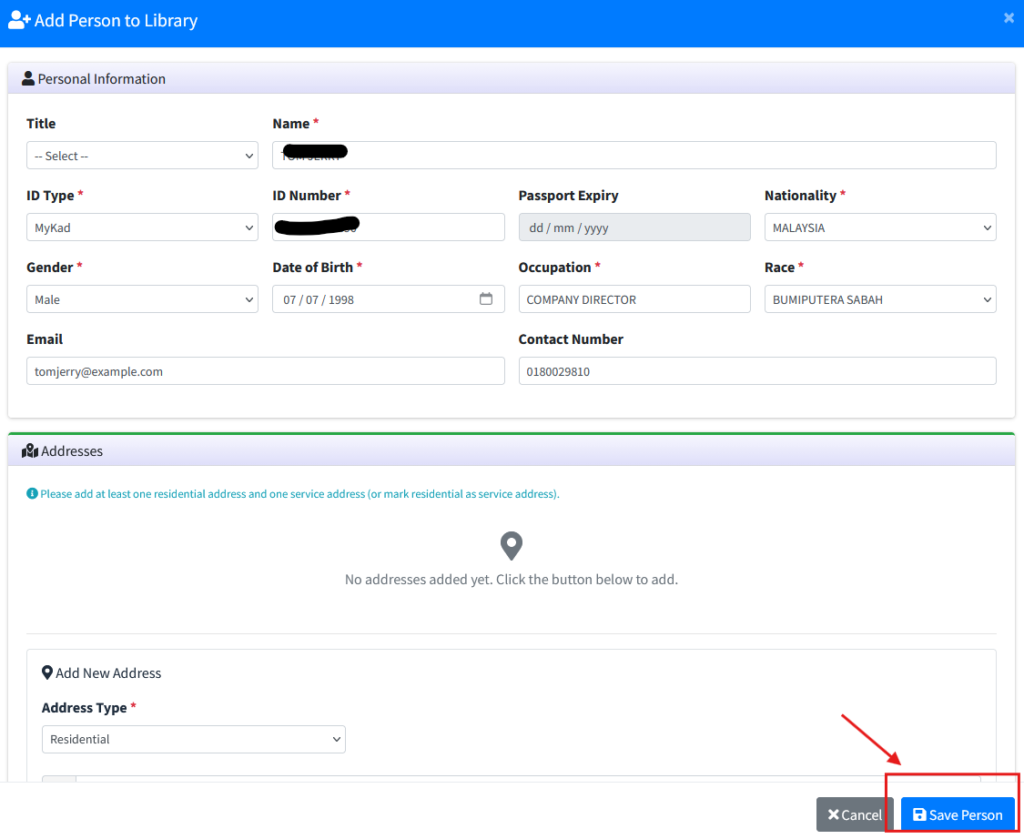
3. After successfully adding the person to your library, the person will appear in the Library dropdown list. You can then select the newly added person directly from the dropdown and add them as a beneficial owner from the ADD BENEFICIAL OWNER form.