
The Client Storeroom is a file management module used to securely store and easily organize client-related documents.

Roles and Permissions
Access to the Storeroom is determined by user roles:
- Company Secretary (Cosec): Full access. Cosec is able to upload files, manage folders (create, rename, move, delete), and delete or restore files from the Recycle Bin.
- Assistant: Partial access. Can upload files, manage folders, and restore files from the Recycle Bin. The assistant cannot permanently delete files or move them to the Recycle Bin.
- Directors / Viewers: View-only access. Can browse folders and download files. Cannot upload, edit, or delete items.
Folder Management
Users with the “Manage Folders” permission can organize the directory structure.
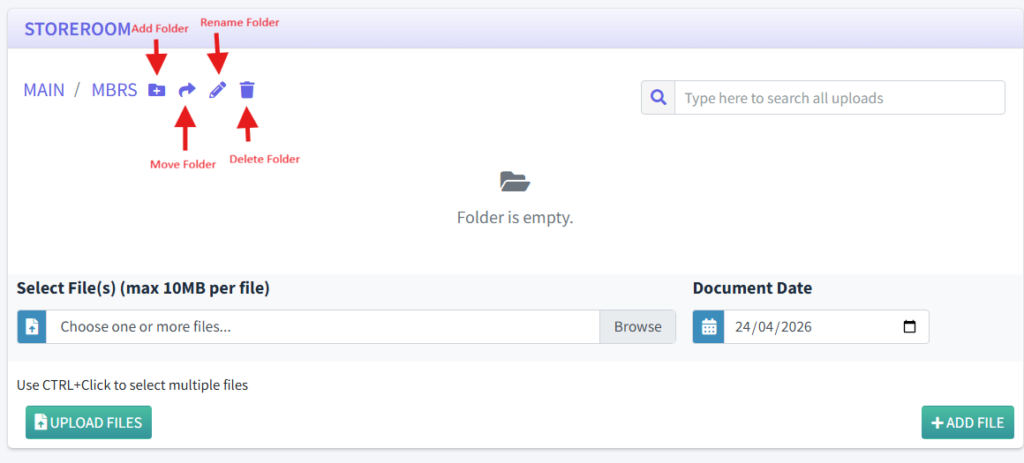
Create a Folder:
- Navigate to the desired location within the client’s Storeroom.
- Click + ADD FOLDER.
- Enter the folder name and click Submit.
Rename or Move a Folder:
- Find the folder in the list.
- Under the actions column:
- Click the Pencil Icon to rename.
- Click the Arrow Icon to move the folder to a different parent directory.
Delete a Folder:
- Find the folder in the list and click the Trash Icon. Note: A folder cannot be deleted unless it is completely empty (0 files and 0 subfolders).
File Management

Upload Files:
- Open the destination folder.
- Go to the “UPLOAD SECTION” at the bottom.

- Click Browse to browse your local device. (Hold CTRL while clicking to select multiple files).
- Click UPLOAD FILES to confirm.
Move Files:
- Locate the file in the “Uploads” list.

- Click the Arrow Icon in the actions column.
- Select the new destination folder from the dropdown and confirm.
Generate a Certified True Copy (CTC):
- Locate the PDF file you wish to certify. (Note: CTC generation only works on PDF files).
- Select the appropriate signature from the list and confirm the CTC Date.
- Review the generated visual preview of the watermark.
- Click the Generate .
Delete Files:
- Locate the file and click the Trash Icon.
- The file is removed from the active folder and transferred to the Recycle Bin.
Recycle Bin
When files are deleted, they are temporarily held in the Recycle Bin to prevent accidental data loss.
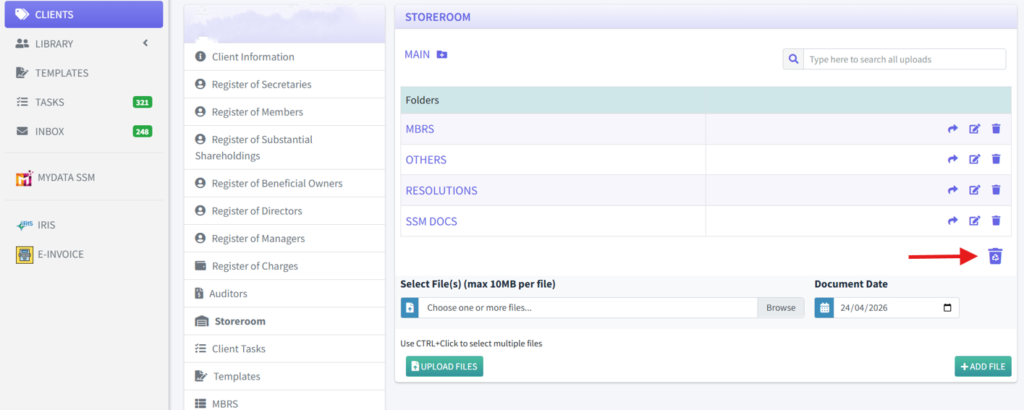
- The link to the Recycle Bin is only available on the main folder.
- Deleted files remain in the Recycle Bin for 14 days.
- After the 14-day retention period, the system will automatically delete the files. This is a permanent action and the files cannot be retrieved.
- The original folder path is displayed beneath the filename for reference.
Restore a File: (Requires “Restore Deleted Files” permission)

- Click the Recycle Bin button in the top right corner of the Storeroom.
- Locate the file you want to recover.
- Click the Restore Icon next to the file.
- The file will be restored to its original folder location.